


标签:trade 使用 format ade cer art files 朋友 linux
前言
之前一直用的eolinker的免费版,但是人数有限,所以想找个免费开源的API管理平台,然后就选择了CRAP-API。
步骤
部署环境
LNMT部署
我的环境是之前部署的是LNMP,后面又增加的JDK和Tomcat没部署的朋友可以使用oneinstack一键自动部署来安装好。
Maven部署
Maven部署 | 其实正常来说,直接下载编译好的安装包更改下数据库配置就阔以了,但是我当时用NGINX忘记将静态资源跳转,一直加载不到静态资源,所以克隆了源码,用Maven重新又打了包。
创建虚拟主机
# cd oneinstack
# ./vhost.sh?
#######################################################################
#? ? ? ?OneinStack for CentOS/RedHat 6 Debian 8 and Ubuntu 14 ? ? ? #
#? ? ? ?For more information please visit https://oneinstack.com? ? ? #
#######################################################################
Please choose to use environment:
? ? ? ? 1. Use php
? ? ? ? 2. Use java
Please input a number:(Default 1 press Enter) 1
What Are You Doing?
? ? ? ? 1. Use HTTP Only
? ? ? ? 2. Use your own SSL Certificate and Key
? ? ? ? 3. Use Let's Encrypt to Create SSL Certificate and Key
? ? ? ? q. Exit
Please input the correct option: 3
Please input domain(example: www.example.com):
domain=
Please input the directory for the domain: :
(Default directory: /data/wwwroot/):?
Virtual Host Directory=/data/wwwroot/
Create Virtul Host directory......
set permissions of Virtual Host directory......
Do you want to add more domain name? [y/n]: n
Do you want to redirect all HTTP requests to HTTPS? [y/n]: n
[2019年 10月 16日 星期三 09:27:58 CST] Single domain=''
[2019年 10月 16日 星期三 09:27:58 CST] Getting domain auth token for each domain
[2019年 10月 16日 星期三 09:27:58 CST] Getting webroot for domain=''
[2019年 10月 16日 星期三 09:27:58 CST] Getting new-authz for domain=''
[2019年 10月 16日 星期三 09:28:00 CST] The new-authz request is ok.
[2019年 10月 16日 星期三 09:28:00 CST] Verifying:
[2019年 10月 16日 星期三 09:28:05 CST] Pending
[2019年 10月 16日 星期三 09:28:08 CST] Pending
[2019年 10月 16日 星期三 09:28:10 CST] Pending
[2019年 10月 16日 星期三 09:28:13 CST] Pending
[2019年 10月 16日 星期三 09:28:16 CST] Pending
[2019年 10月 16日 星期三 09:28:19 CST] Pending
[2019年 10月 16日 星期三 09:28:22 CST] Success
[2019年 10月 16日 星期三 09:28:22 CST] Verify finished, start to sign.
[2019年 10月 16日 星期三 09:28:24 CST] Cert success.
-----BEGIN CERTIFICATE-----
xxxxxxxxxxxxxxxx
-----END CERTIFICATE-----
[2019年 10月 16日 星期三 09:28:24 CST] Your cert is in? /root/.acme.sh//.cer?
[2019年 10月 16日 星期三 09:28:24 CST] Your cert key is in? /root/.acme.sh//.key?
[2019年 10月 16日 星期三 09:28:25 CST] The intermediate CA cert is in? /root/.acme.sh//ca.cer?
[2019年 10月 16日 星期三 09:28:25 CST] And the full chain certs is there:? /root/.acme.sh//fullchain.cer?
Do you want to add hotlink protection? [y/n]: n
Allow Rewrite rule? [y/n]: n
Allow Nginx/Tengine/OpenResty access_log? [y/n]: y
You access log file=/data/wwwlogs/_nginx.log
nginx: the configuration file /usr/local/nginx/conf/nginx.conf syntax is ok
nginx: configuration file /usr/local/nginx/conf/nginx.conf test is successful
Reload Nginx......
#######################################################################
#? ? ? ?OneinStack for CentOS/RedHat 6 Debian 8 and Ubuntu 14 ? ? ? #
#? ? ? ?For more information please visit https://oneinstack.com? ? ? #
#######################################################################
Your domain:? ? ? ? ? ? ? ? ?
Virtualhost conf:? ? ? ? ? ? ?/usr/local/nginx/conf/vhost/.conf
Directory of:? ? ? ? ? ? ? ? ?/data/wwwroot/
Let's Encrypt SSL Certificate:/usr/local/nginx/conf/ssl/.crt
SSL Private Key:? ? ? ? ? ? ? /usr/local/nginx/conf/ssl/.key
修改NGINX配置
注意静态资源的跳转不要忘记了!!!不要忘记了!!!不要忘记了!!!我就掉在这个坑里过...修改完成后,重新载入下配置文件。
# cd /usr/local/nginx/conf/vhost/
# vi .conf
server {
listen 80;
listen 443 ssl http2;
ssl_certificate /usr/local/nginx/conf/ssl/xxxxx.crt;
ssl_certificate_key /usr/local/nginx/conf/ssl/xxxxx.key;
ssl_protocols TLSv1 TLSv1.1 TLSv1.2 TLSv1.3;
ssl_ciphers TLS13-AES-256-GCM-SHA384:TLS13-CHACHA20-POLY1305-SHA256:TLS13-AES-128-GCM-SHA256:TLS13-AES-128-CCM-8-SHA256:TLS13-AES-128-CCM-SHA256:EECDH CHACHA20:EECDH AES128:RSA AES128:EECDH AES256:RSA AES256:EECDH 3DES:RSA 3DES:!MD5;
ssl_prefer_server_ciphers on;
ssl_session_timeout 10m;
ssl_session_cache builtin:1000 shared:SSL:10m;
ssl_buffer_size 1400;
add_header Strict-Transport-Security max-age=15768000;
ssl_stapling on;
ssl_stapling_verify on;
server_name xxxx;
access_log /data/wwwlogs/xxxxxx_nginx.log combined;
index index.html index.htm index.jsp;
root /data/wwwroot/xxxxx/;
#error_page 404 /404.html;
#error_page 502 /502.html;
location / {
proxy_set_header Host $host:80;
proxy_set_header X-Real-IP $remote_addr;
proxy_set_header x-forwarded-for $remote_addr;
proxy_pass http://127.0.0.1:8080;
}
location ~ [^/].php(/|$) {
# comment try_files $uri =404; to enable pathinfo
try_files $uri =404;
fastcgi_pass unix:/tmp/php-cgi.sock;
fastcgi_index index.php;
include fastcgi.conf;
#include pathinfo.conf;
}
location ~ .*.(gif|jpg|jpeg|png|bmp|swf)$ {
proxy_pass http://127.0.0.1:8080;
expires 30d;
}
location ~ .*.(js|css)?$ {
proxy_pass http://127.0.0.1:8080;
expires 12h;
}
}
# service nginx reload
下载CRAP
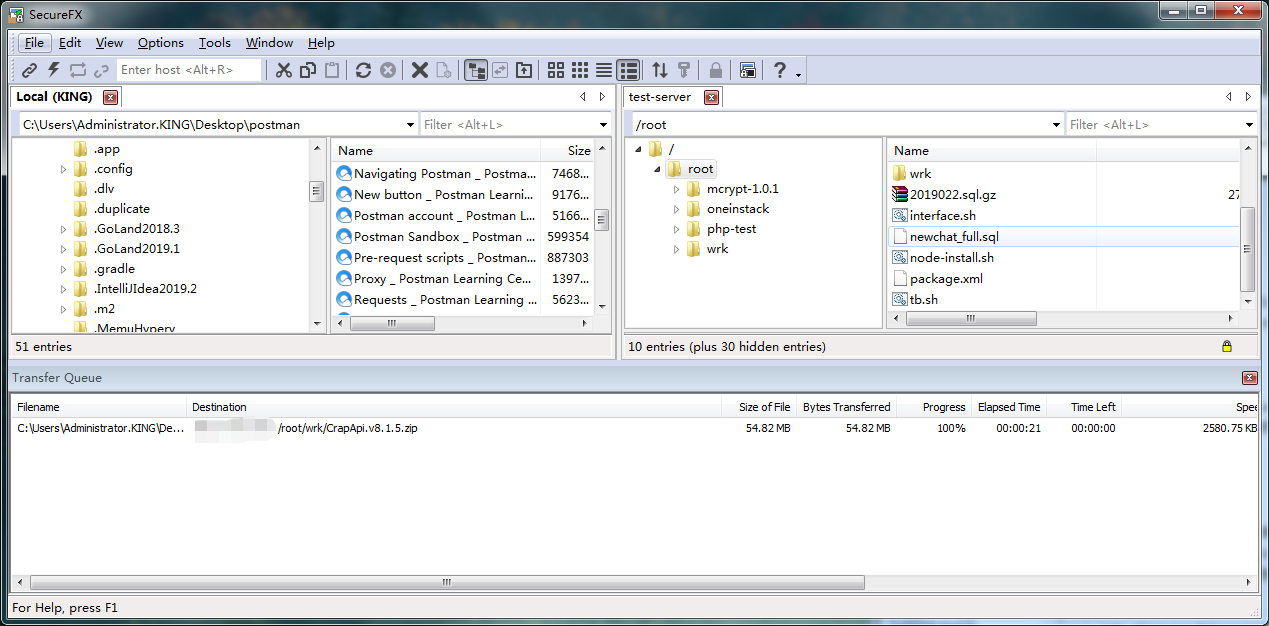
CRAP历史版本源码|安装包下载 | 我这边部署的时候,使用的是最新的包v8.1.5版本的,这边推荐直接下载编译好的包,并通过远程工具SCRT上传到服务器上。
创建数据库
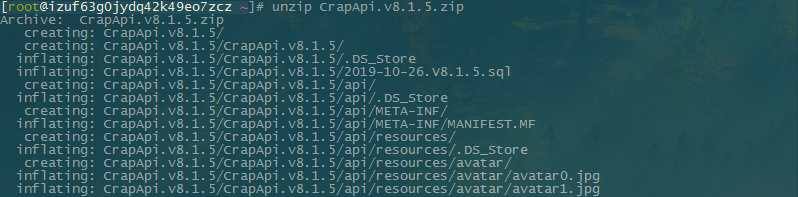
解压压缩文件
# unzip CrapApi.v8.1.5.zip
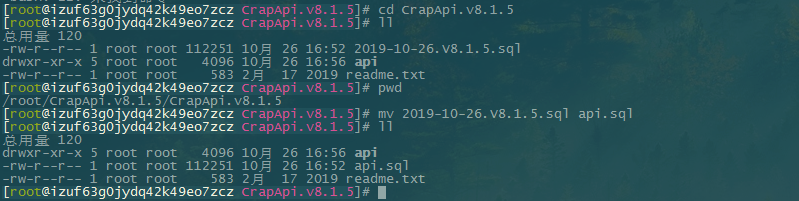
查看SQL文件
这是便于后面方便直接导入sql文件。
# cd CrapApi.v8.1.5
# ll
总用量 120
-rw-r--r-- 1 root root 112251 10月 26 16:52 2019-10-26.V8.1.5.sql
drwxr-xr-x 5 root root 4096 10月 26 16:56 api
-rw-r--r-- 1 root root 583 2月 17 2019 readme.txt
# pwd
/root/CrapApi.v8.1.5/CrapApi.v8.1.5
# mv 2019-10-26.V8.1.5.sql api.sql
# ll
总用量 120
drwxr-xr-x 5 root root 4096 10月 26 16:56 api
-rw-r--r-- 1 root root 112251 10月 26 16:52 api.sql
-rw-r--r-- 1 root root 583 2月 17 2019 readme.txt
建库并导入SQL文件
# mysql -uroot -p
Enter password:
Welcome to the MySQL monitor. Commands end with ; or g.
Your MySQL connection id is 150536
Server version: 5.6.42-log MySQL Community Server (GPL)
Copyright (c) 2000, 2018, Oracle and/or its affiliates. All rights reserved.
Oracle is a registered trademark of Oracle Corporation and/or its
affiliates. Other names may be trademarks of their respective
owners.
Type 'help;' or 'h' for help. Type 'c' to clear the current input statement.
MySQL [(none)]> create database api_test;
Query OK, 1 row affected (0.00 sec)
MySQL [(none)]> use api_test;
Database changed
MySQL [api_test]> source /root/CrapApi.v8.1.5/CrapApi.v8.1.5/api.sql
Query OK, 0 rows affected (0.00 sec)
:
:
:
Query OK, 0 rows affected (0.00 sec)
MySQL [api_test]>
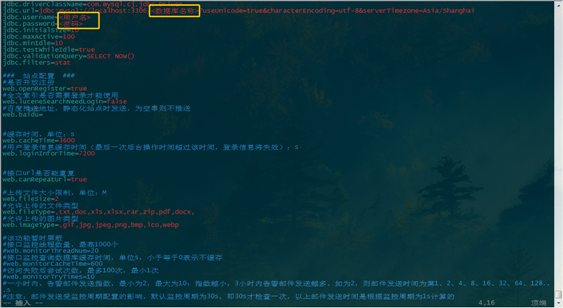
修改CRAP-API配置
这里只修改了数据的配置文件config.properties,日志的未做修改。
# cd api/WEB-INF/classes/
# vi config.properties
配置Tomcat
删除webapps下的所有文件
# cd /usr/local/tomcat/webapps/
# rm -rvf *
修改编译包名
# cd /root/CrapApi.v8.1.5/CrapApi.v8.1.5
# mv api ROOT
# ll
总用量 120
-rw-r--r-- 1 root root 112251 10月 26 16:52 api.sql
-rw-r--r-- 1 root root 583 2月 17 2019 readme.txt
drwxr-xr-x 5 root root 4096 10月 26 16:56 ROOT
移包并启动服务
# cd CrapApi.v8.1.5/CrapApi.v8.1.5/
# cp -rvf ROOT/ /usr/local/tomcat/webapps/
# cd /usr/local/tomcat/bin/
# ./ startup.sh
访问页面
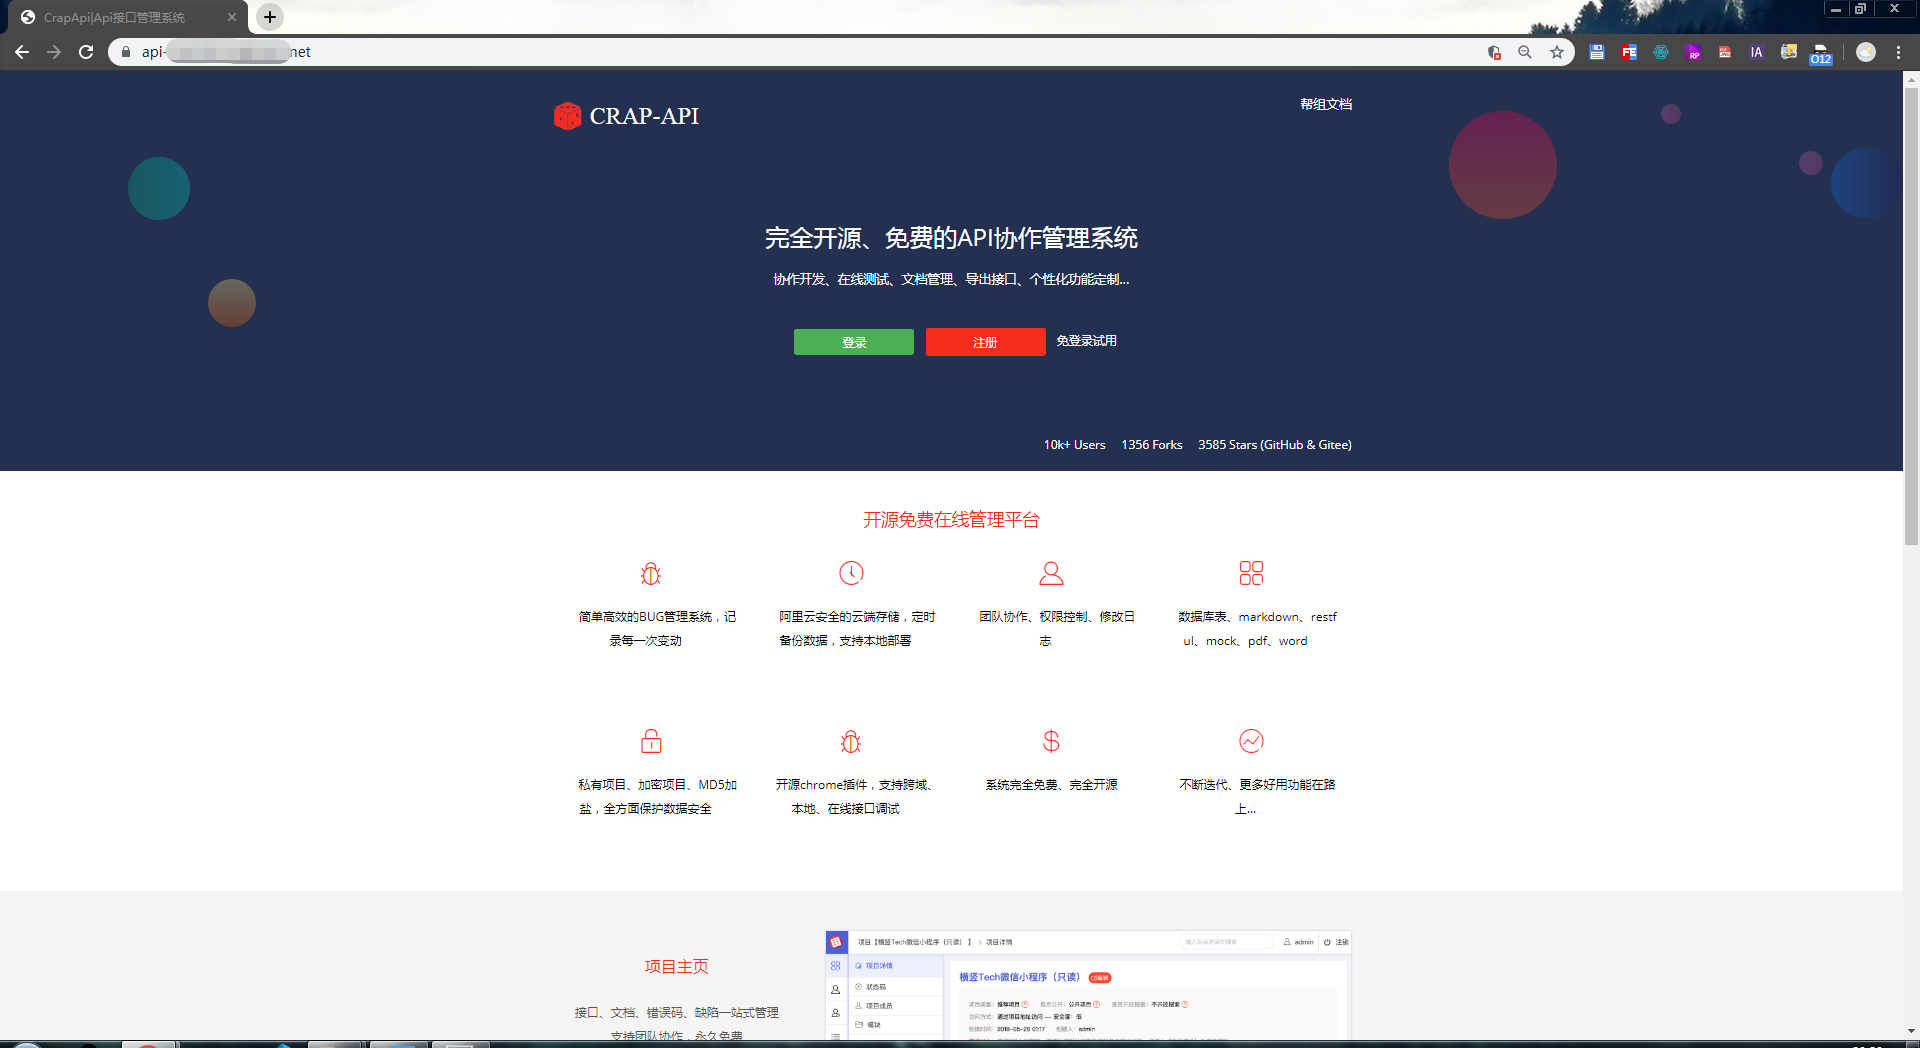
CRAP-API——如何在Linux服务器部署CRAP-API教程
标签:trade 使用 format ade cer art files 朋友 linux


 586
586


 被折叠的 条评论
为什么被折叠?
被折叠的 条评论
为什么被折叠?
 到【灌水乐园】发言


